Conas raca a dhéanamh le haghaidh muca guine le do lámha féin: treoracha agus líníochtaí
The decision to make a rack for guinea pigs with your own hands will provide animals with a compact and comfortable home in an apartment. Any cage from a pet store will be too cramped for these rodents, and not every owner can afford the arrangement of a home aviary.
Преимущество самодельного стеллажа в том, что он не займет много места, а его стоимость будет зависеть только от выбранных материалов.
Clár ábhair
Roghnú tionscadail
Unlike ready-made models, a rack made at home can be a good addition and decoration to the interior. You can choose a design that will find a place even in a small apartment, as well as find materials suitable for the style of furniture. On the Internet you can see various drawings and diagrams, from very simple models to real palaces.
In order for the pigs to have enough space to move, it is better to make a two-story rack, or higher. The presence of several floors will allow you to separate the feeding area to facilitate cleaning, will make it possible to seat conflicting or heterosexual animals. An economical solution would be to use old or unnecessary furniture as the basis for the rack – cabinets, whatnots.
Ábhair agus uirlisí riachtanacha
It is easiest to make a rack out of wood, this material is affordable and easy to process. Natural wood will also be safe both for the rodents themselves and for the tenants of the apartment. But it should be noted that wooden boards will absorb odors and moisture, so it is important to immediately take care of special sealant impregnations.
Также можно изготовить стеллаж из фанеры, ЛДСП, гофрированного картона, пластика или оргстекла. При большой длине стеллажа толщина полок должна быть не менее 2-2,5 см, иначе они будут прогибаться. Если вы хотите наблюдать за жизнью питомцев, лучше сделать фасад из прозрачного материала — подойдет прочный пластик, закаленное стекло. Для выполнения всех этапов работы необходимо заранее подготовить набор инструментов:
- hand saw-hacksaw;
- chonaic port leictreach;
- стяжки, саморезы, гвозди;
- casúr;
- screwdriver, drill;
- siosúr do mhiotal;
- pencil, marker;
- рулетка или линейка, строительный уровень.
To glue joints and fasten small parts, prepare construction glue. For fastening opening elements – doors, hatches, it is better to purchase special fittings in a furniture store. For the installation of ventilation windows, you will need a metal mesh with cells up to 2 cm.
Nós imeachta déantúsaíochta
To prepare for work, a scheme is made taking into account all the specific dimensions. For a sample, you can take any drawing of a rack or whatnot. Substitute your dimensions, be sure to check whether the rack will fit in the space allotted for it.
IMPORTANT: When choosing a place, it is important to consider that the rack should not be placed next to batteries and other heating devices.
Don’t make the shelves too deep as this will make cleaning difficult. The distance between the floors should be sufficient so that the pigs, if necessary, can stand on their hind legs. After the drawing is ready, proceed to manufacture:
- The finished scheme is transferred to the material using a marker with a ruler. Use a jigsaw or hacksaw to cut wood pieces.
- If necessary, a frame is assembled from wooden bars.
- The base and ceiling of the second floor are treated with silicone sealant or other waterproof impregnations. Another option is to purchase plastic pallets for the filler, but it is not always possible to find the right size.
- К основанию при помощи винтов-стяжек или саморезов крепятся боковые стены. На уровне первого этажа обязательно следует сделать большие вентиляционные окна.
- The side windows are closed with a mesh, which is fastened with screws.
- Устанавливается перекрытие второго этажа, в нем заранее делается отверстие-люк для пандуса.
- The top floor can be left open for better ventilation, and the absence of a ceiling will also make cleaning easier. It is important that the walls are higher than 30 cm, then the pig will not be able to jump out and hurt itself.
- If you decide to close the second floor, you can use plexiglass drop-down doors. All doors are recommended to be mounted on furniture hinges.
- Inside the rack, be sure to place several shelters for rest and sleep, preferably one for each animal. The pig will also like shelves and elevations. Do not forget about toys – otherwise the rodent will take up the details of its home.
- In order to make it convenient for the animals to climb to the second floor, it is better to put not a wire ladder, but a ramp – a flat wide board with glued rails.
The rack itself must be placed at a sufficient height, at least 15-30 cm, otherwise the animals will face drafts.
Выходом может стать установка изделия на тумбочке, которую удобно будет использовать для хранения наполнителя, сена и других принадлежностей для ухода за свинками. Если в месте расположения стеллажа освещение недостаточное, рекомендуется сделать дополнительную подсветку. Прикрепите на каждом этаже подвесные лампы дневного света.
We also recommend that you read the article “Step-by-step instructions for creating a cage for a guinea pig with your own hands”
Video: how to make a rack for guinea pigs with your own hands
Homemade rack for guinea pig
3.5 (70%) 2 vótaí


Bealtaine tú like Chomh maith leis sin
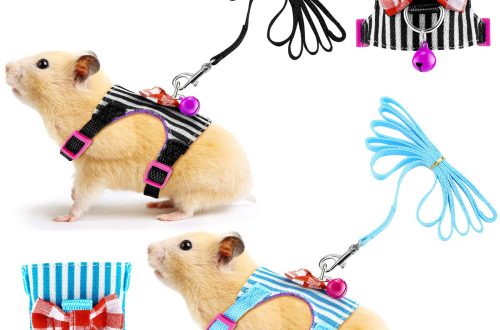
Luaidhe hamstair, úmacha agus coiléar – cur síos agus comparáid
Pórú hamsters Djungarian sa bhaile: faisnéis maidir le pórú agus cúpláil